
Create Tasks
Tasks are where real work happens. Learn how to break projects into actionable items, set due dates, assign owners, add priority labels, and track progress — giving your team clear direction and full visibility at every stage.
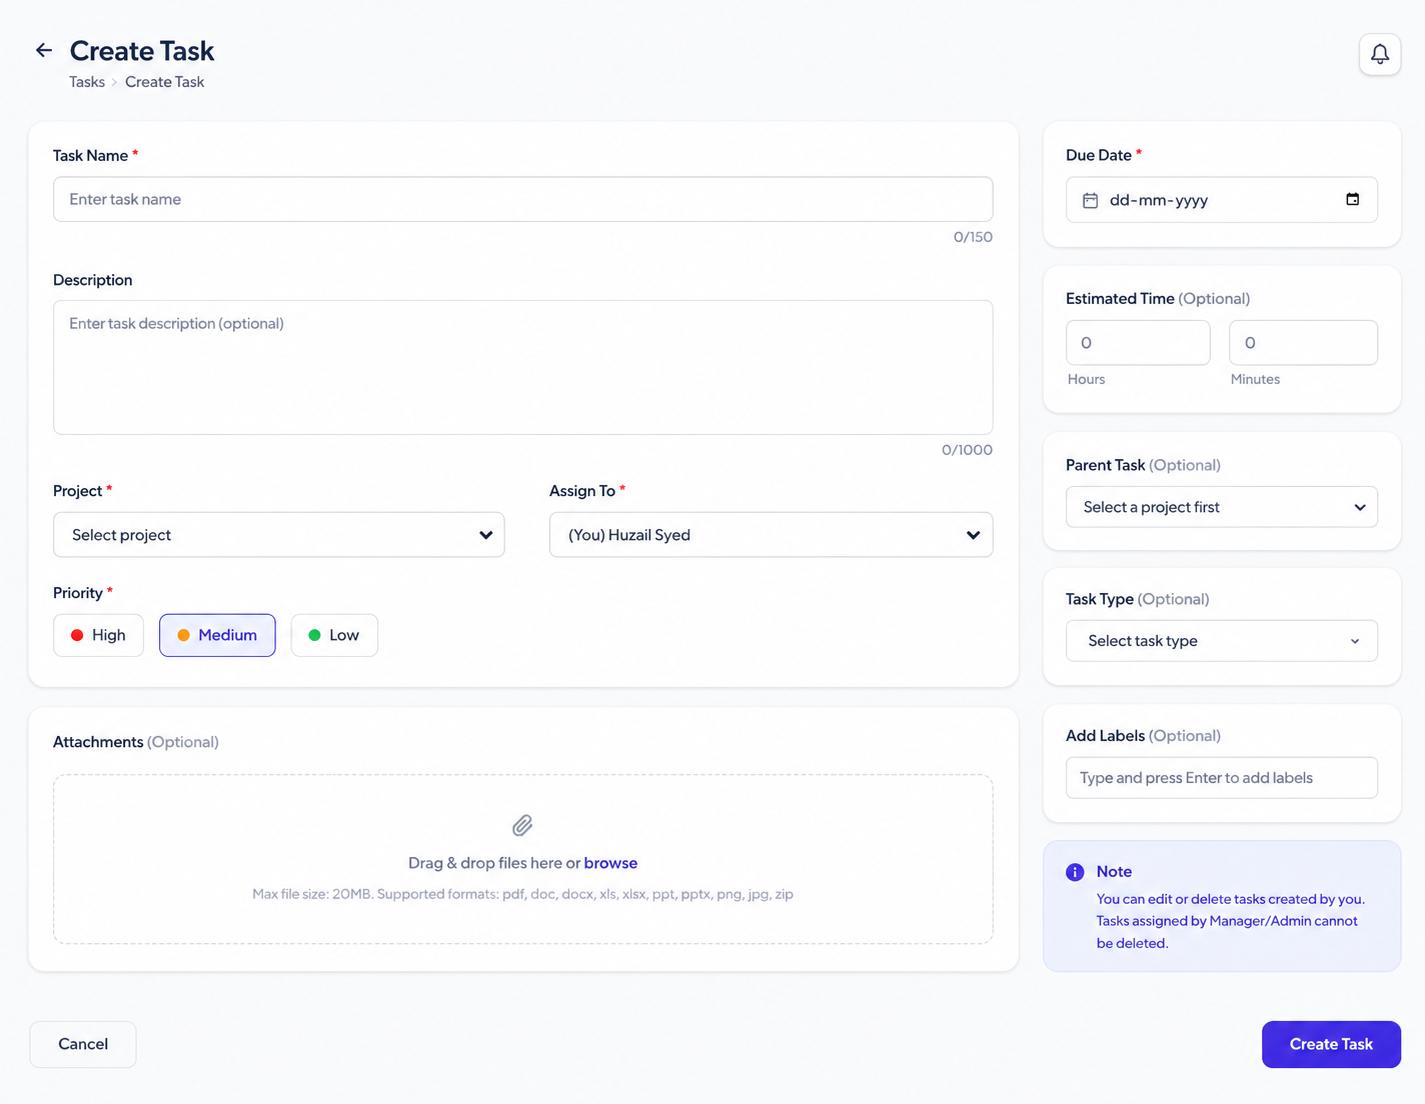
Step 1: Open a Project
Navigate to the project where you want to add tasks by clicking it from the Projects overview. You can also create tasks from the global "Tasks" view in the sidebar, which aggregates items across all your projects.
Step 2: Create a New Task
Click the "+ Task" button at the top of any list column or board lane. Type a task name and press Enter to save it instantly — you can add further details by clicking the task to open its detail panel.
Step 3: Add Task Details and a Deadline
In the task detail panel, add a description to provide context for your team. Set a due date so the task appears on the Calendar view and triggers a notification reminder one day before it is due.
Step 4: Assign Owners and Set Priority
Use the Assignee field to assign the task to a specific team member — tasks without owners are shown in the "Unassigned" group in List view. Set a priority level (Low, Medium, High, or Urgent) to help your team triage work during standups.
Step 5: Switch Between Task Views
Use the view selector above the task list to toggle between List, Board (Kanban), and Calendar views. All views reflect the same data in real time — switching views never loses your work or filters.