
Manage Clients
Keep all your client information in one place. This guide shows you how to add clients, link them to projects, store contact details, and track relationship history — so your team always has the context they need to deliver exceptional service.
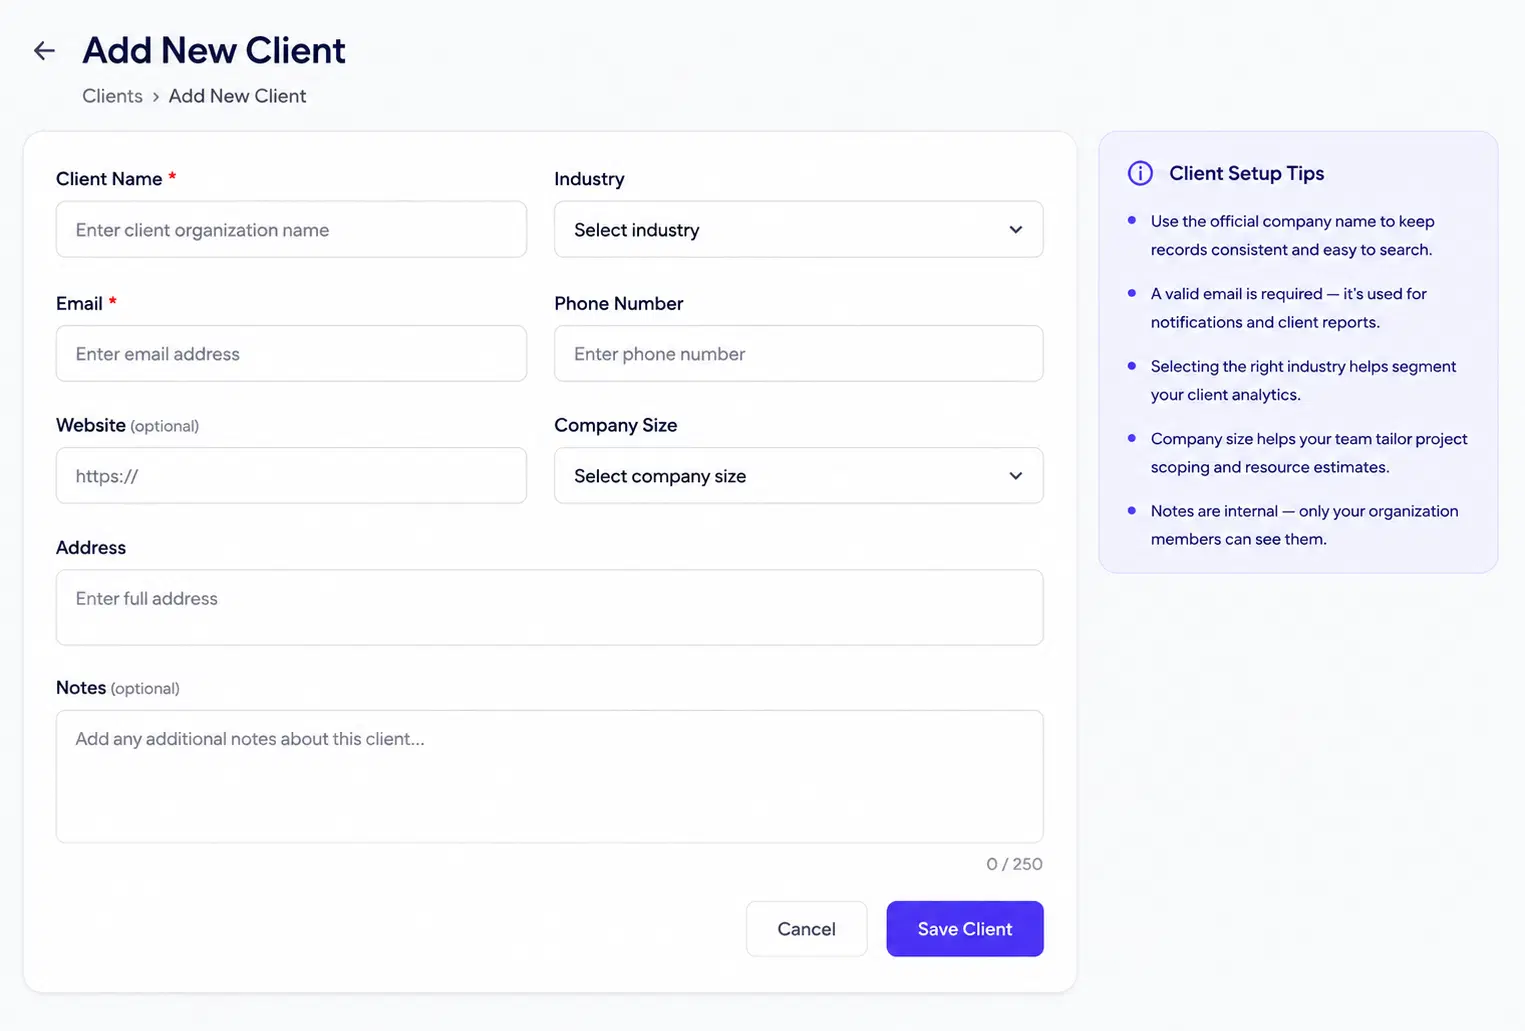
Step 1: Open the Clients Section
Click "Clients" in the left sidebar to enter the client management area. If you have not added any clients yet, you will see a "New Client" prompt in the center of the screen.
Step 2: Add a New Client
Click "Add Client" and fill in the client name, primary contact name, email address, phone number, and website URL. The client name is the only required field — all other details can be added or edited at any time.
Step 3: Complete the Client Profile
Inside the client record, use the "Notes" field to capture relationship context, contract terms, or preferences. Notes are visible to all workspace members with access to Clients, but are never shared with the client directly.
Step 4: Link the Client to Projects
Open any existing project, go to Project Settings, and use the "Client" dropdown to associate the project with this client. A single client can be linked to multiple projects simultaneously — all linked projects appear on the client profile page.
Step 5: Use the Client Dashboard
The client profile page aggregates a live summary of all linked projects: their statuses, open task counts, and upcoming deadlines. Use this view as a quick brief before client calls or status reviews.